Building a Greenhouse: Part 2
Our tips for building a greenhouse from a kit.
It’s so easy in the dead of winter in the Midwest to spend your life savings on seed catalogs and a fresh new greenhouse kit. If you nearly did just that, and find yourself looking for an inside peek into what building a kit greenhouse is really like, read on.
You can read all about why we chose the Palram Glory greenhouse kit in our previous post, so here we’ll share our experience building.
Prep work to build a greenhouse
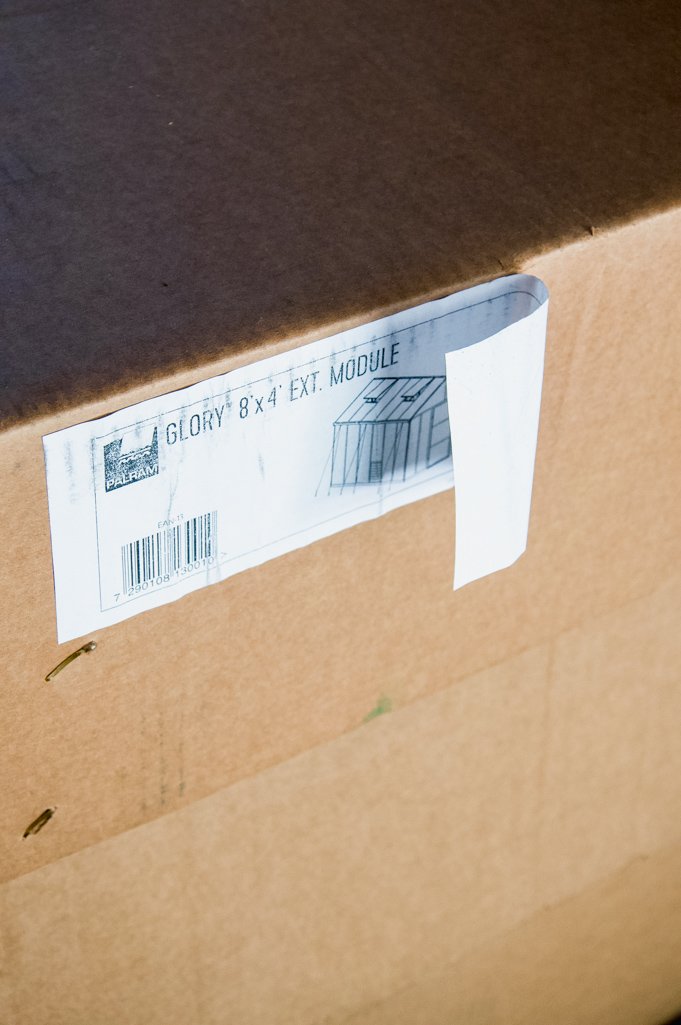
Our greenhouse kit arrived in three large boxes. Luckily the contents of the boxes were labeled: base kit plus two extension kits. We ordered our kit early on and kept it in the garage because we were hearing pandemic-related stories of shortages. This turned out to be correct by spring.
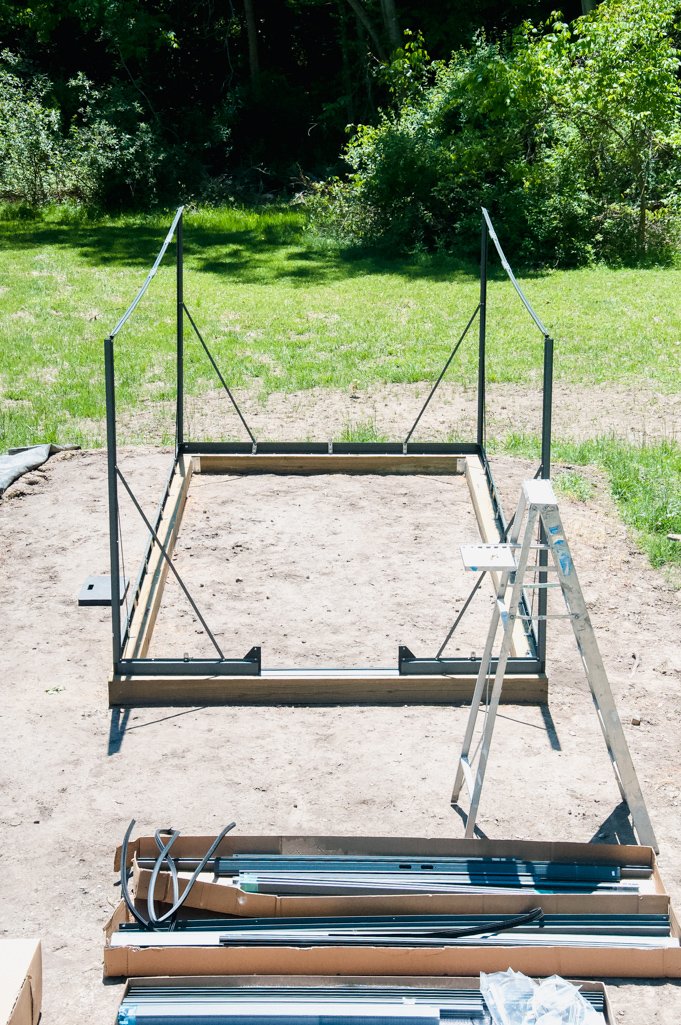
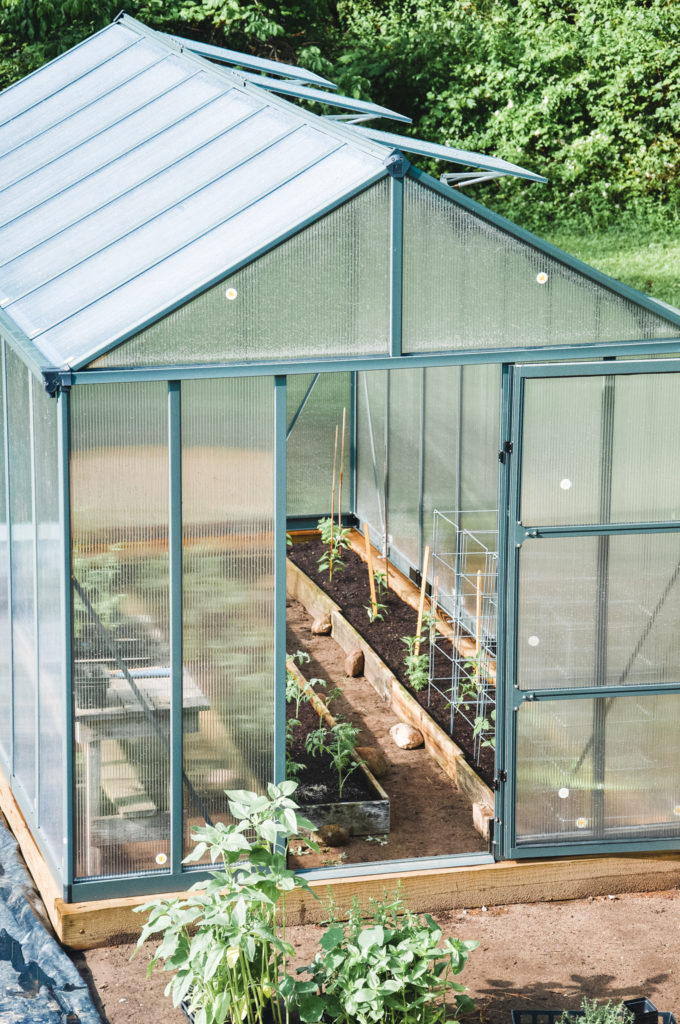
As soon as the frost laws lifted and the ground could be worked, we hired an excavator to install a level pad for our greenhouse to live. I can’t stress how important this part of the project is, especially with a larger structure like ours. Even with our laser-leveled ground, we still had plenty of adjustments to make as we went along. You can certainly build on a cement pad or a wooden platform, etc. We wanted to be able to grow in-ground to take advantage of the most height.
We really didn’t realize how sloped our backyard was until the excavator brought in 15 yards of topsoil. In the end, we were a little surprised at how dramatic the pad looked in the yard. A greenhouse shrine! We chose to roll with it and embrace it as a feature of the garden. I would definitely recommend making this pad several feet bigger on all sides. You’ll need to accommodate using a ladder during construction. Give yourself wiggle room in making the structure square.
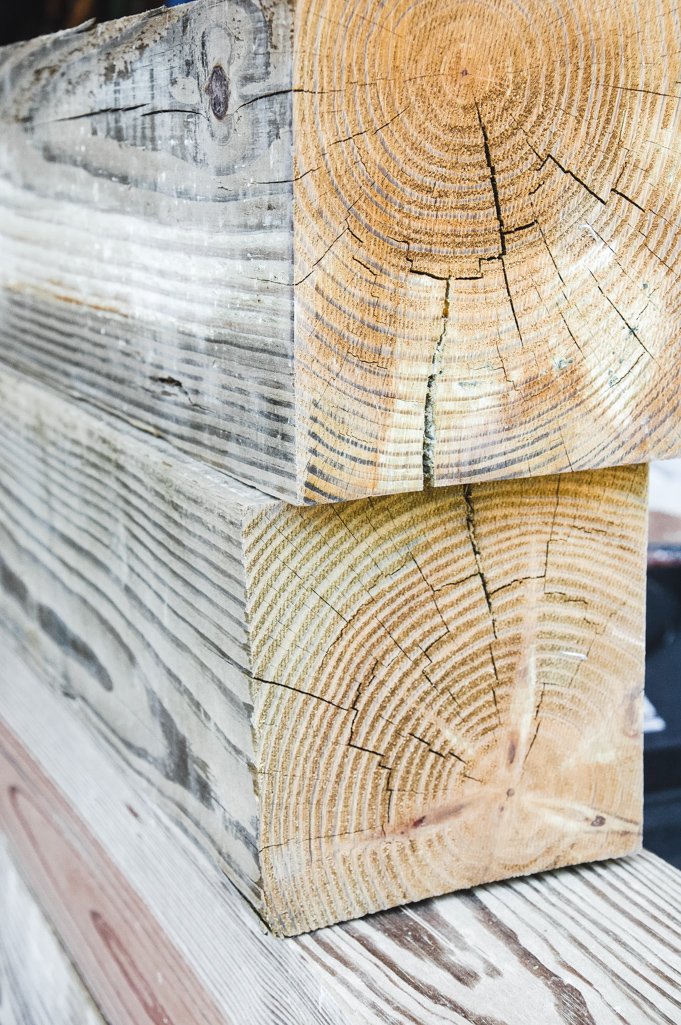
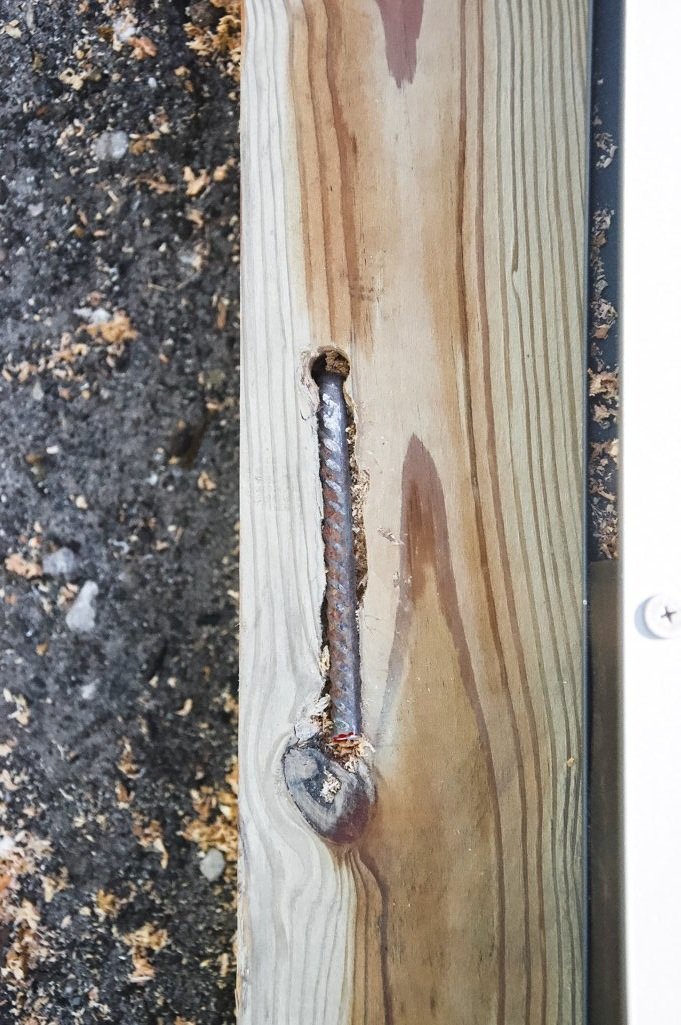
Next up was determining what we wanted our base to look like. More importantly, what was required to make sure it wouldn’t blow away. Since we weren’t building on anything already heavy, we chose to go with a 6”x6” wood base, secured with rebar.

Getting organized to build a greenhouse
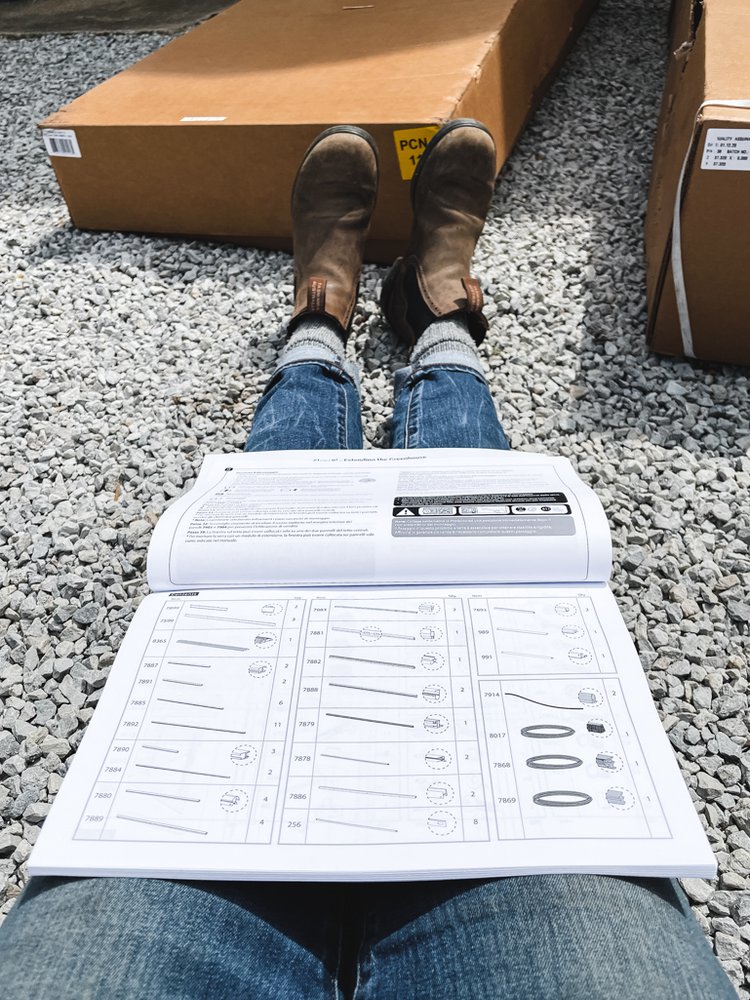
If you’re lucky enough to have a two-car garage, this is where you should start. Keep all the parts (especially the polycarbonate panels) out of the sun and under roof until installation. This is best for making sure they don’t warp or become damaged. Find a helper and begin by inventorying all the parts. I know that this sounds tedious, and it definitely is, but it will help familiarize you with what to expect later on. It’s certainly better to know if you’re missing a part now rather than later on a ladder with a storm approaching.
Some of the parts have little white labels with the part number, and some are actually imprinted on the pieces. It helps to have one person finding the numbers on the parts and calling them out, while the other person checks them off the list on the manual. Here’s my hot tip for inventorying tiny parts: Label the above tool organizer with the part numbers in the instruction manual. It will save you loads of time later on! It’s hard to differentiate between the many tiny screws and part numbers printed upside down on the plastic bags. Listen to your greenhouse fairy godmother and do it!
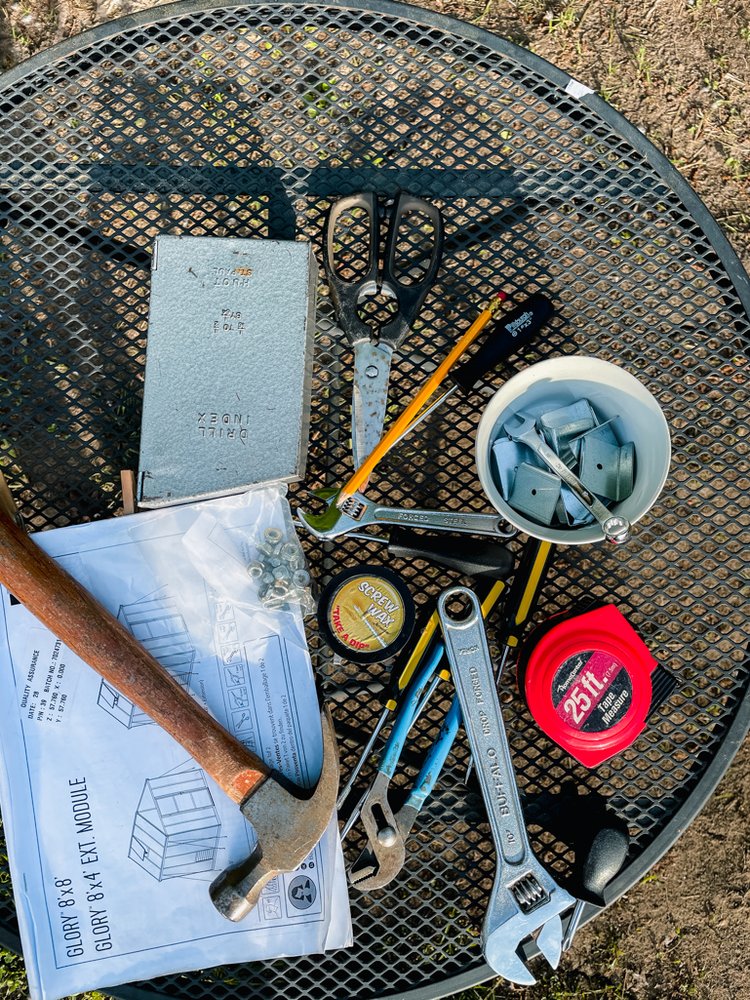
This is also the time to secure two size 10 metric wrenches and socket wrenches. Nothing but metric will work. It is cruel to find this out after you’ve lugged the whole kit outside to build and have nothing to build it with.
My other recommended tools include: A ladder, hammer, tape measure, screwdrivers, pencil, scissors, cordless power drill, bits, a few empty bowls or plastic containers (to carry your hardware on the ladder and not lose it), chip clip or clothes pin (to keep your place in the manual) and knee pads. Oh, and a table to keep all of these tools off the ground.
Starting to build a greenhouse
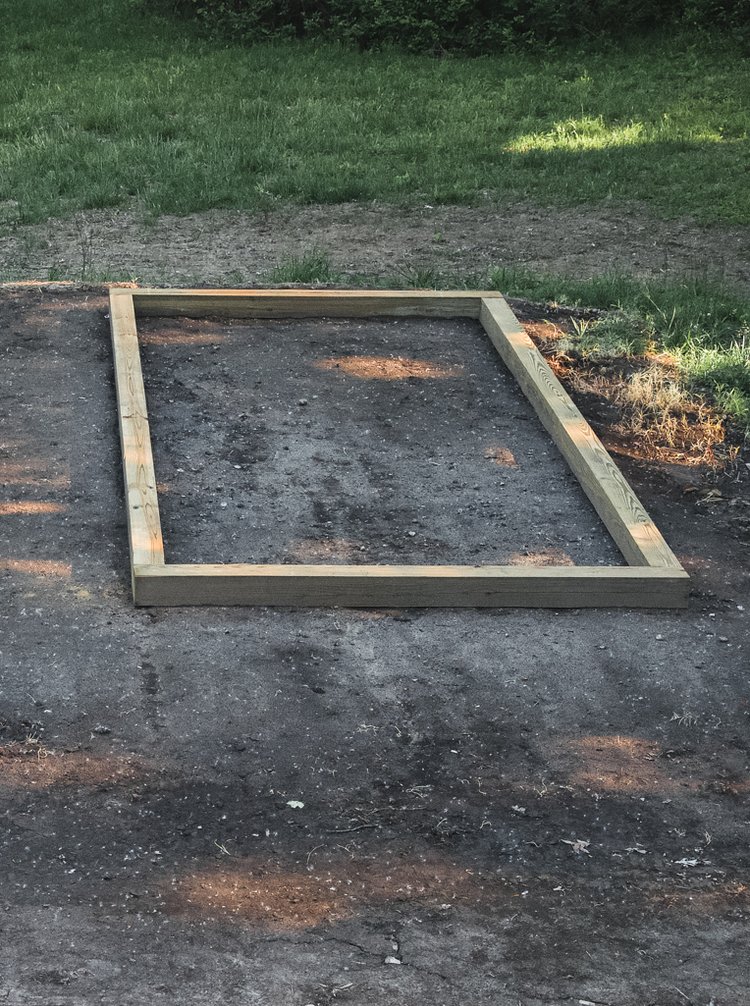
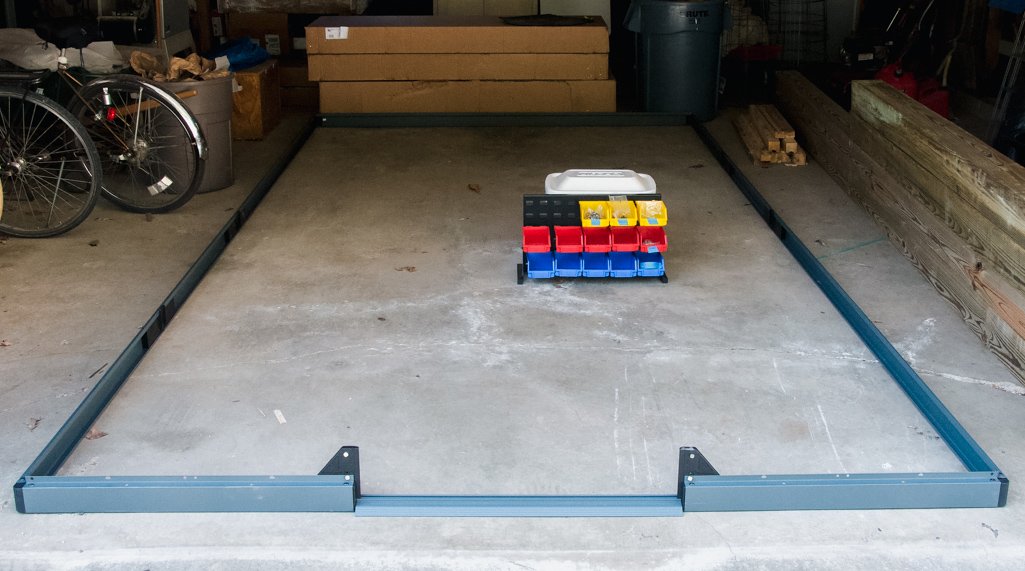
The first step in the building process is to install the level square wood base. We were lucky enough to have our handy friend, Ben, around to help us get this perfect. Start by eye-balling generally where you want the base to be. Then measure the diagonals on each corner to make sure that those lengths are the same.
Once the base is secured to the ground by rebar and corner L brackets, you’re ready to build. We took a close look at the weather and chose a nice June weekend to start building. High winds and storms are not ideal for this project. Unlike some online reviews of this greenhouse kit, it will definitely not take you 2 hours to build it (it took us about a week).

Along the way building a greenhouse
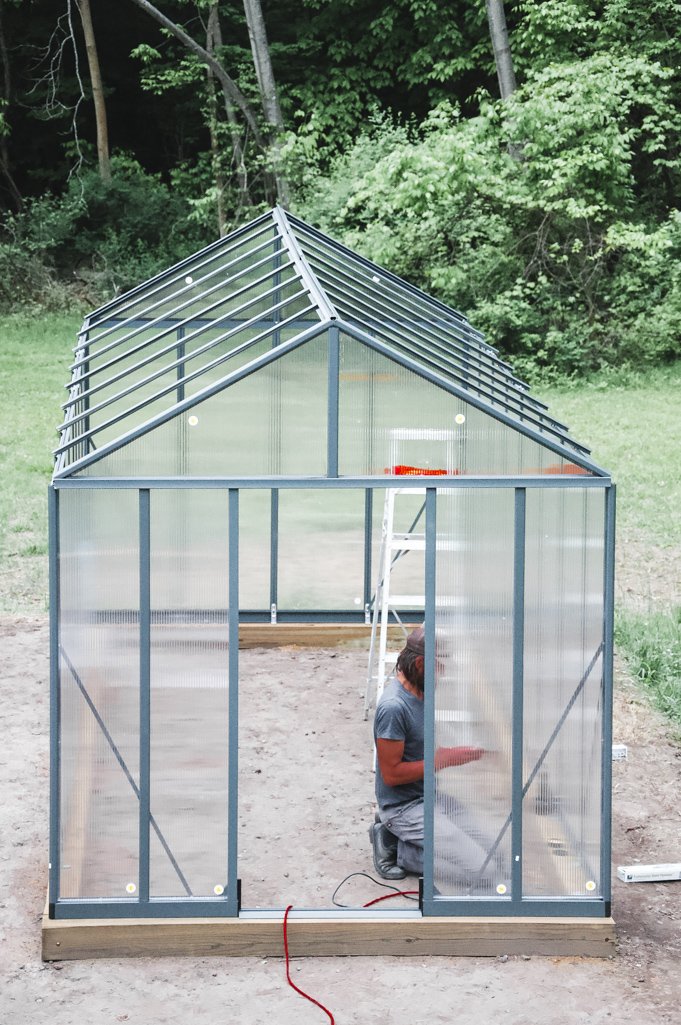
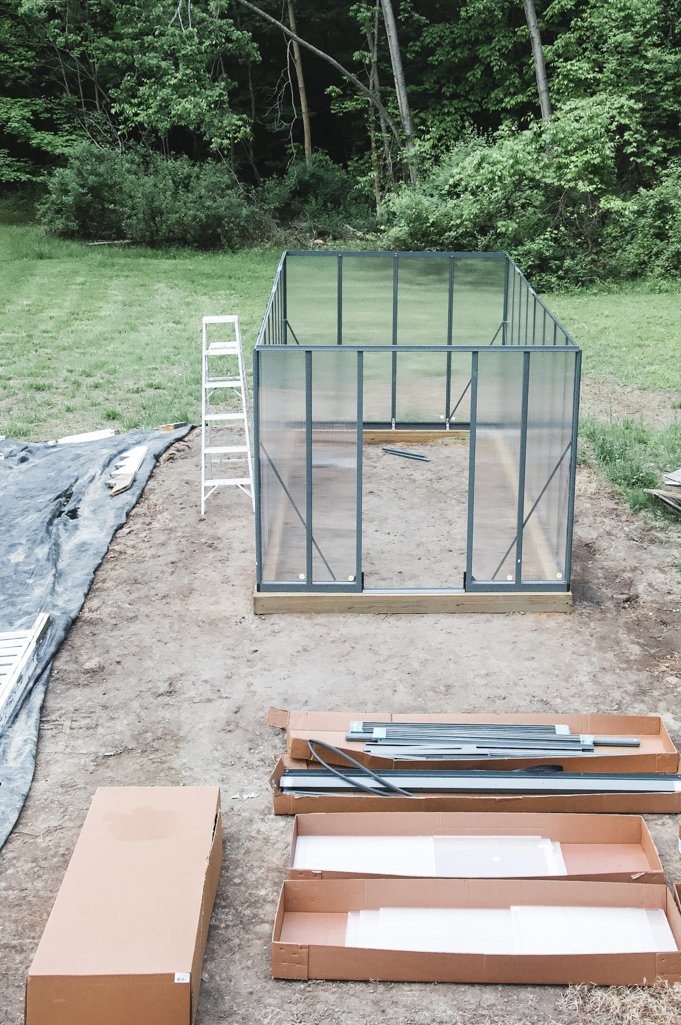
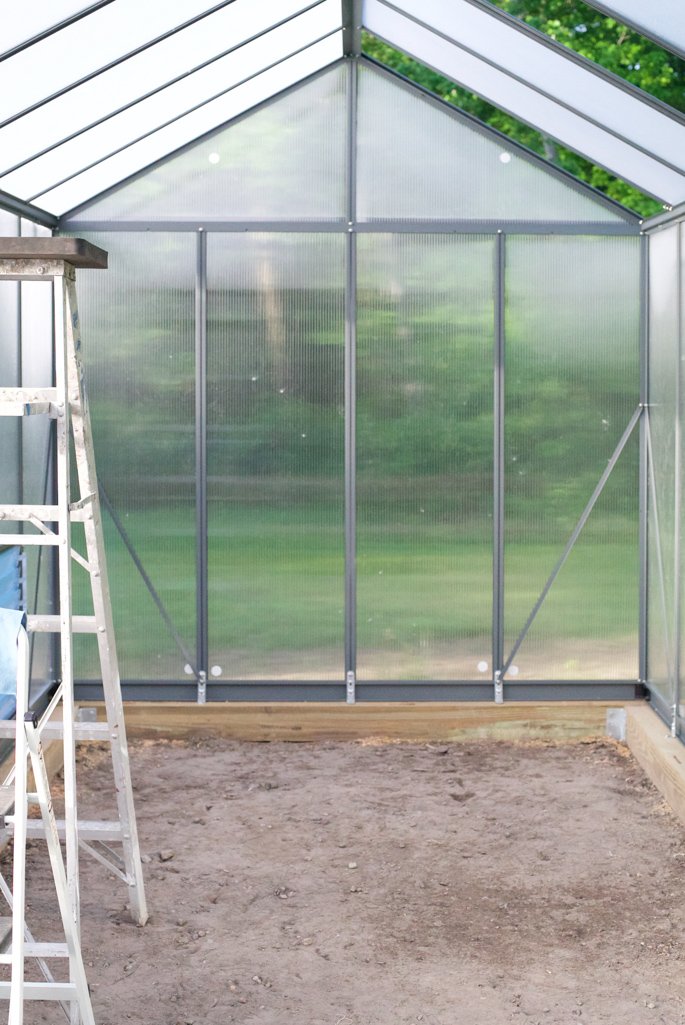
From here on out it’s really just chugging along with the instruction manual. The four sides of the greenhouse are built first. The polycarbonate panels help to hold the whole thing in place. Next, add the roof and slowly add more poly panels as you go. The manual suggests that you don’t screw the greenhouse into the wood base until the very last step. This is because the greenhouse frame needs to give and sway a little bit as the pieces come together, and a stiff frame won’t allow for that. We weren’t able to finish this project in a day, and winds were forecasted, so we did secure the greenhouse down in a few key places until we could finish. We also noticed that we kept knocking the frame out of square as we were working, which really makes the project grueling.
Halfway into the project we really struggled with what we still believe is an incorrectly manufactured piece in the side louvre vents. I would characterize this moment as filled with fleeting statements like “do you think I can use the sawzall on this” followed by “let’s just tear this whole thing down and not do this project”. So yes, you could say things got a little dark for a few moments. But we’re really happy we pushed through.
The extension kit instructions are lacking. There is some guesswork involved with making sure you’re doing things in the correct order. The biggest challenge is getting the roof braces to fully line up for installation to prevent a sway in the top beam. We made this happen with both of us on a ladder, one person pushing up on the middle roof beam, the other quickly installing the brace while the pressure was off that intersection of metal.
Home Stretch building a greenhouse
While we did have really nice weather for building our greenhouse, it was also peak cottonwood season. We had little fluffy white seeds sticking all over the poly panels, inside and out. I found it easy enough to wash down the panels later with a wet microfiber cloth, as they were dusty from the build.
Sliding the gutters on the sides of our extra long greenhouse was a real challenge. It would impossible if we hadn’t prioritized keeping the greenhouse square throughout the build. I’ll write more about the gutters in another post, but you should know the greenhouse does not come with downspouts. A custom DIY fix is needed to keep water away from the base.
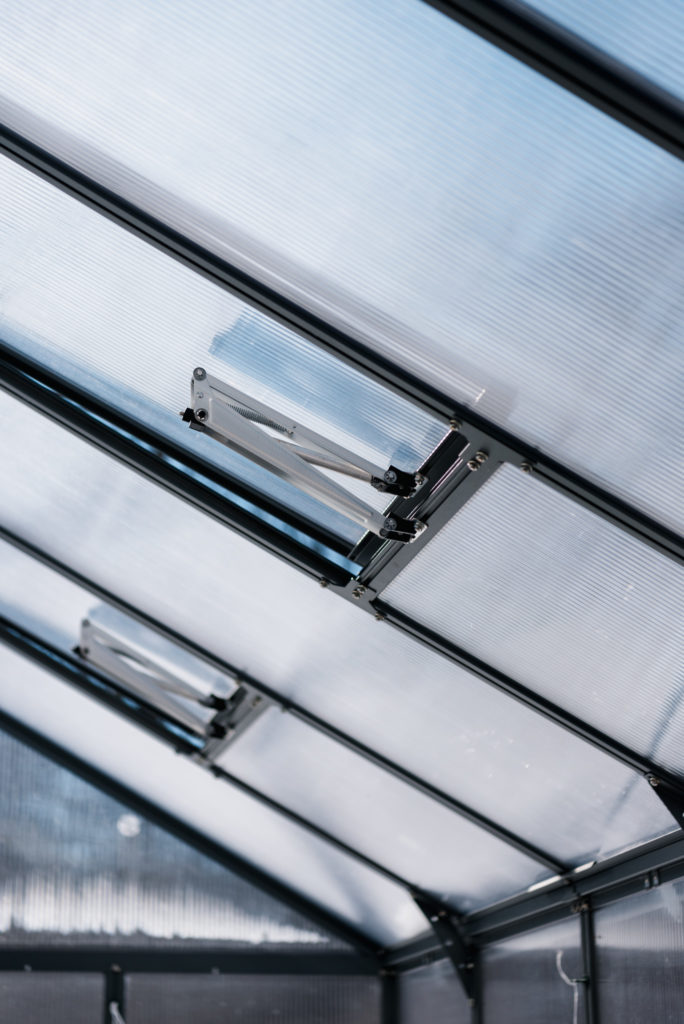
The last bits of installation include setting up and installing the automatic vent openers. This is almost hilariously difficult with normal adult-sized hands and a deliriously tired installation crew. Building this kit is definitely a two-person job and you will definitely drop the tiniest screws that come with this kit a hundred times.
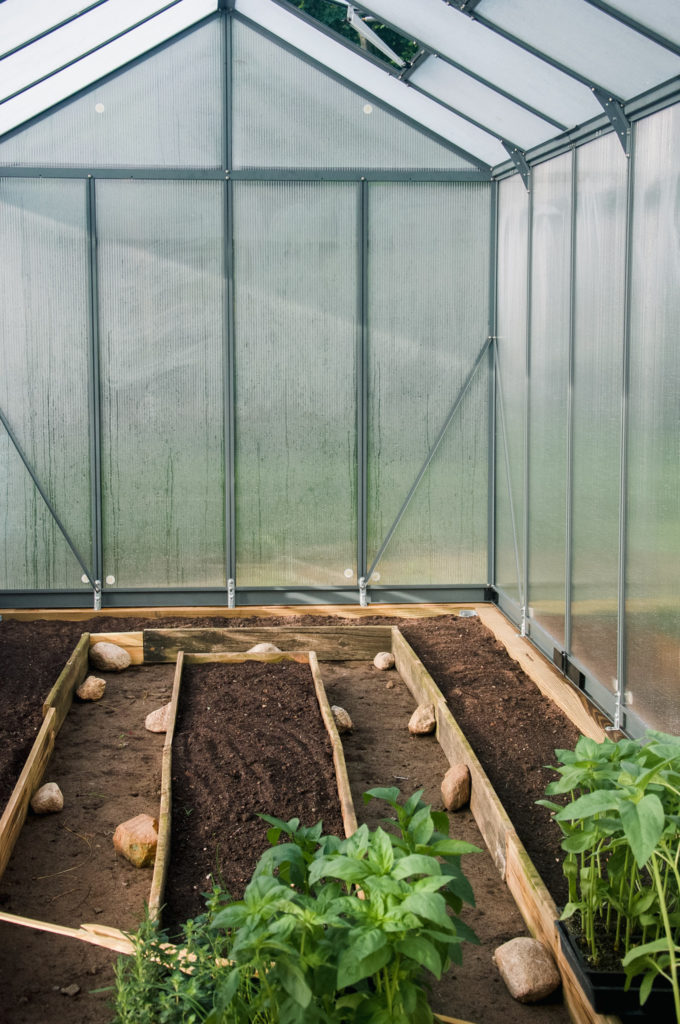
All said and done, it took us about a week to finish this project. Two full weekends bookended some on-and-off weekday chipping away. We were in a hurry to get planting (second week of June!), so we quickly built some temporary beds out of our old salvaged deck boards. We saved installing our drip irrigation system for later on.
Did you enjoy this post?
Please let me know what you think!
Leave a comment below and tag @growingwithgertie on Instagram.
Some of the links listed are affiliate links. This means if you click on a link and purchase the item, I will receive an affiliate commission from the retailer at no cost to you. Thanks for your support!